How to Install 2022+ Tundra SS18 TRD Pro Grille LED Light Bar Kit
The SS18 TRD Pro Grille Lightbar Kit for the 2022+ Toyota Tundra allows you to upgrade your factory-installed Tundra TRD Pro light bar, or add one as part of a TRD grille conversion. The following installation guide will provide you with detailed instructions on how to install the SS18 TRD Pro Grille LED Light Bar Kit for the 2022+ Toyota Tundra. Keep reading for step-by-step instructions!
Looking to convert your 2022+ Toyota Tundra factory grille to a TRD Pro grille? Check out our Installation Video below to learn how to convert your grille and install the SS18 Tundra TRD Pro light bar!
Table of Contents
- Installation Tools
- Installation Video
- Mounting Instructions
- Questions About the Installation?
Installation Tools
Installation Video
Mounting Instructions
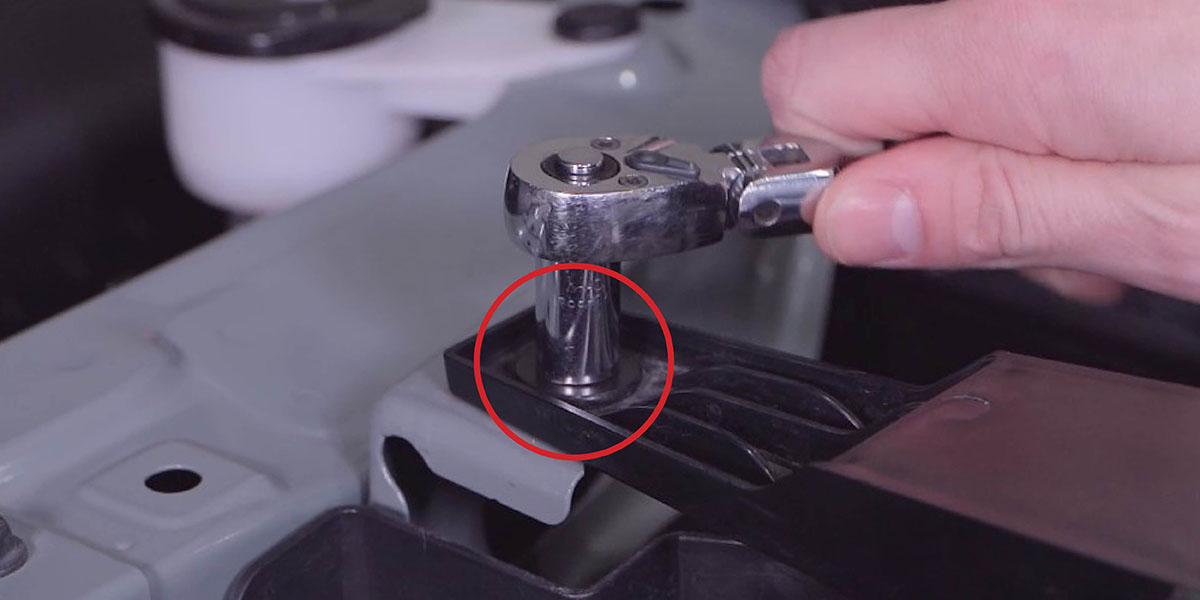
Step 1 - Remove Bolts
Using a 10mm socket, remove the four bolts from the top of the grille.
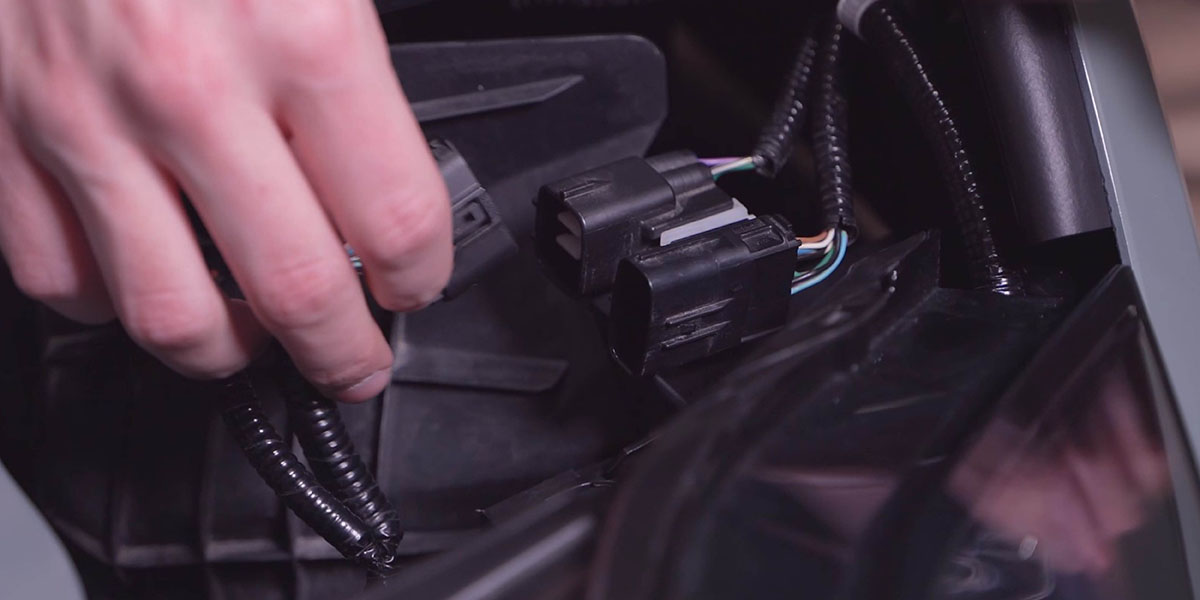
Step 2 - Disconnect Connectors
If equipped, disconnect the connectors from both corners of the grille as shown in the image below.
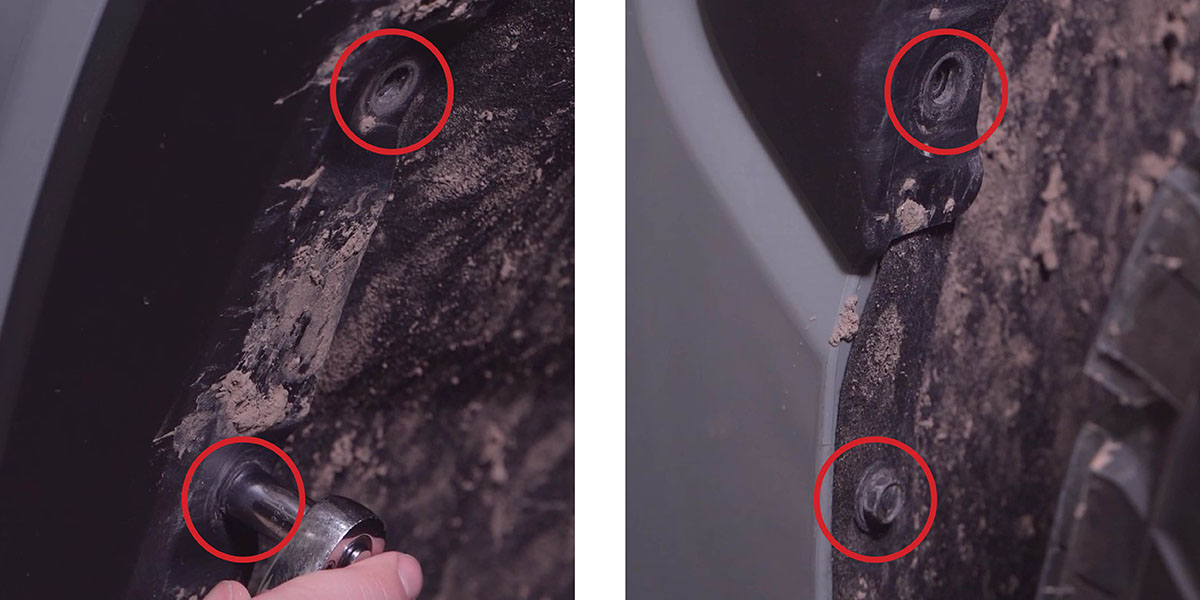
Step 3 - Remove Screws
Using a 10mm socket, remove the four screws from inside the wheel well. If equipped with over-fender molding, remove the additional screw from the bottom inside of the wheel well opening.
Repeat this step on the other side of the vehicle.
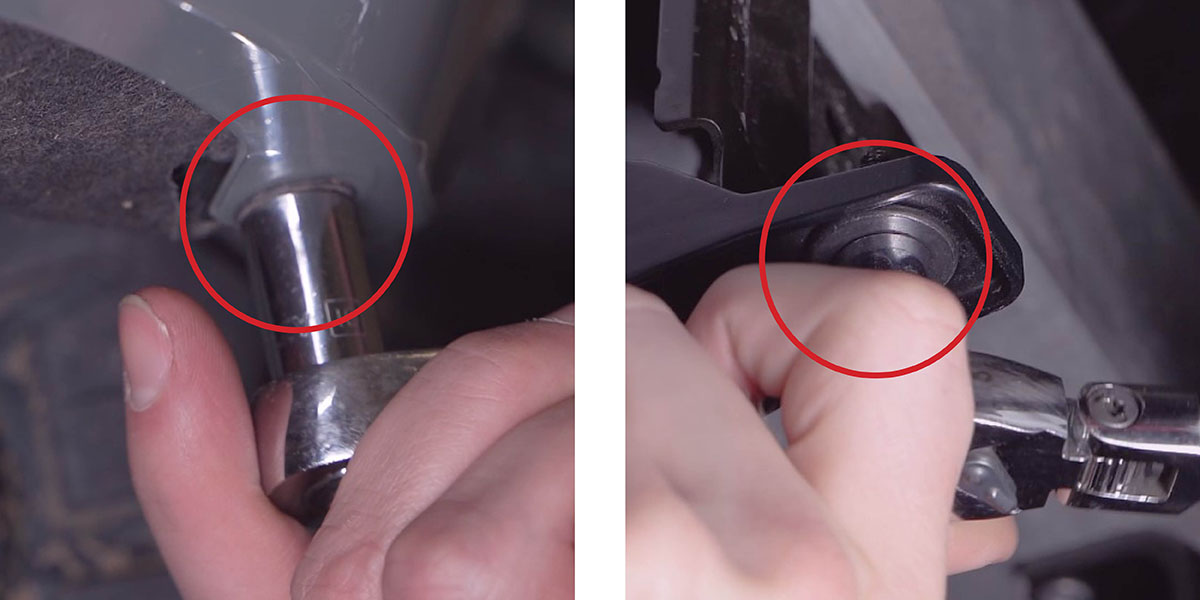
Step 4 - Remove Bumper Bolts
Remove the four 10mm bolts from underneath the bumper. If not equipped with a front spoiler, there will be four screws underneath the bumper that will need to be removed as well.
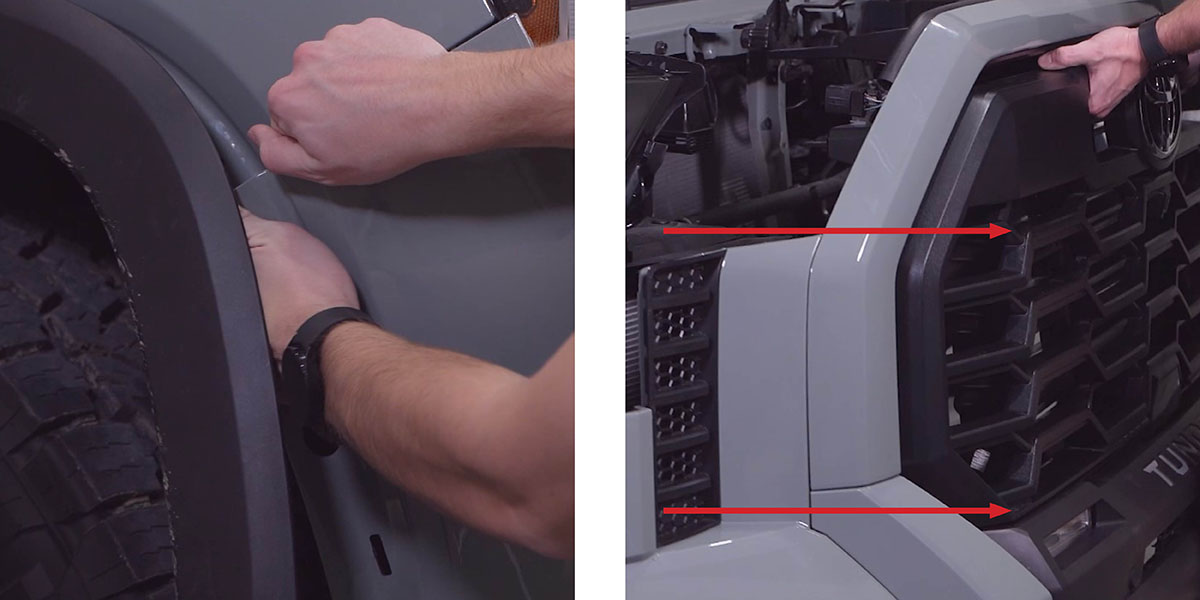
Step 5 - Remove Grille/Bumper
Pull out on both sides to release clips holding the grille in place. Then remove the front grille/bumper assembly by pulling forward.
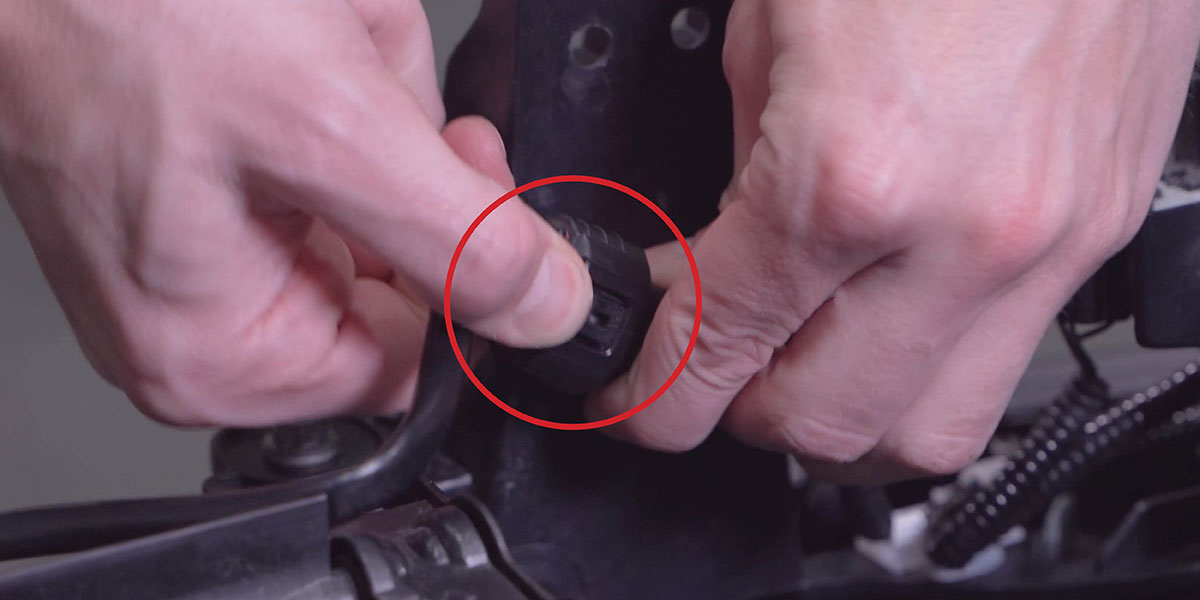
Step 6 - Disconnect Connector
Disconnect the connector from the top right corner next to the bolt and set the active grille shutter assembly aside.
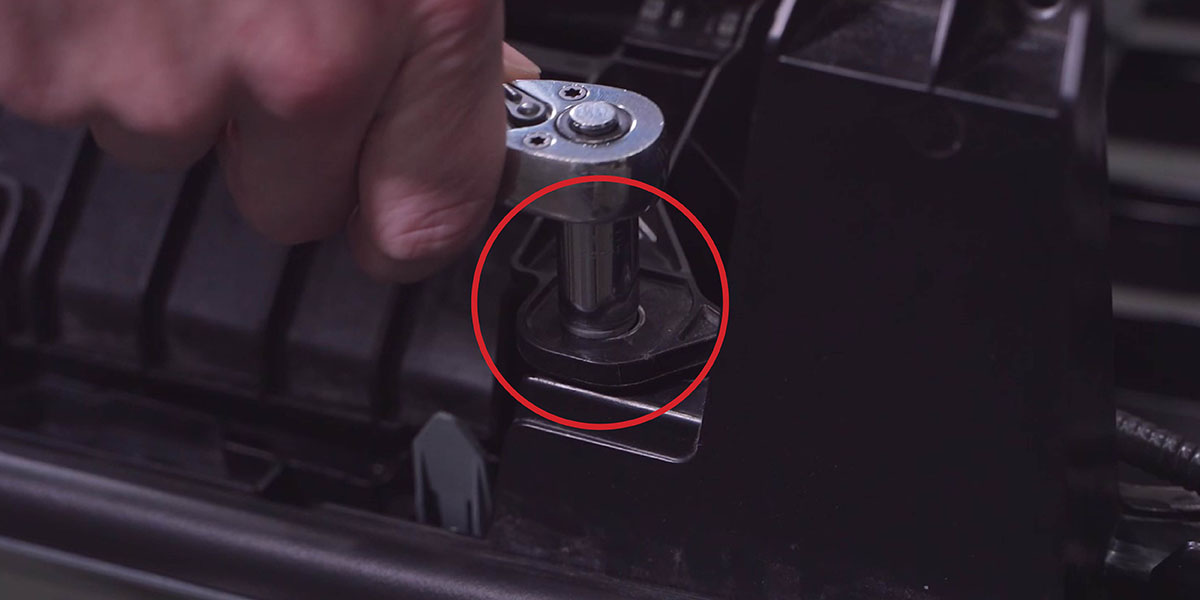
Step 7 - Remove Active Grille Shutter Bolts
Using a 10mm socket, remove the six bolts securing the active grille shutters to the grille/bumper assembly.
Step 8 - Remove Front Camera
If you are converting to a TRD Pro grille, remove your front camera and TSS sensor module by removing the Phillips screws holding them in place. Then, remove your original grille by removing all Phillips screws around the perimeter, and install your new grille in its place.
Finally, reinstall the camera and TSS module on your new TRD Pro grille (camera relocation bracket not included).
Step 9 - Remove TRD Pro Lightbar
If you are replacing your original TRD Pro lightbar, remove it from the grille at this time.
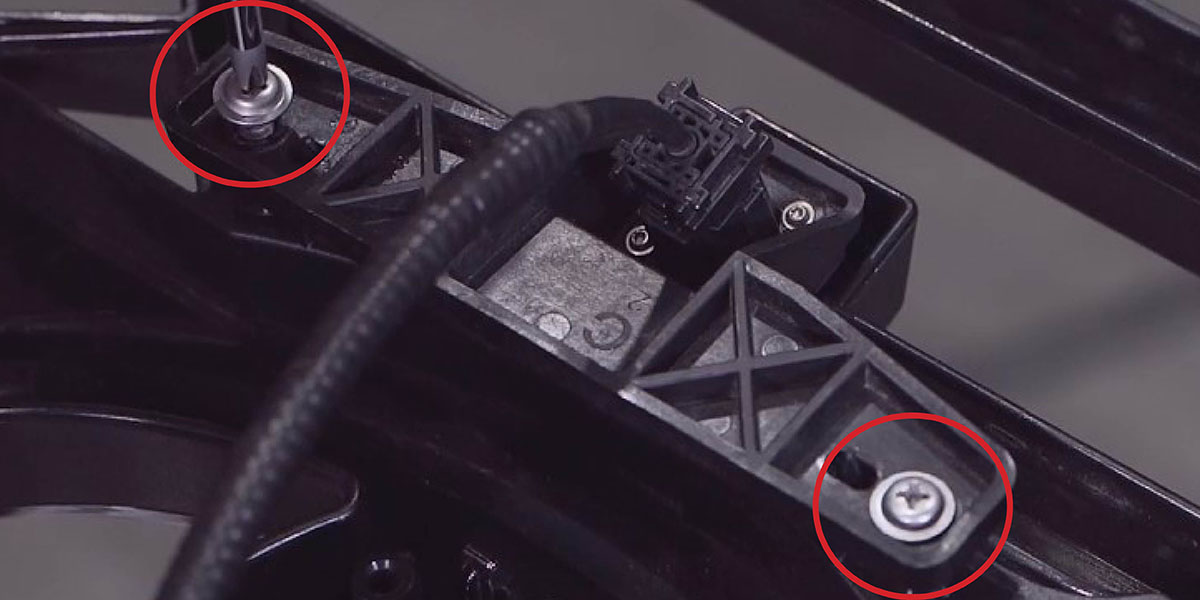
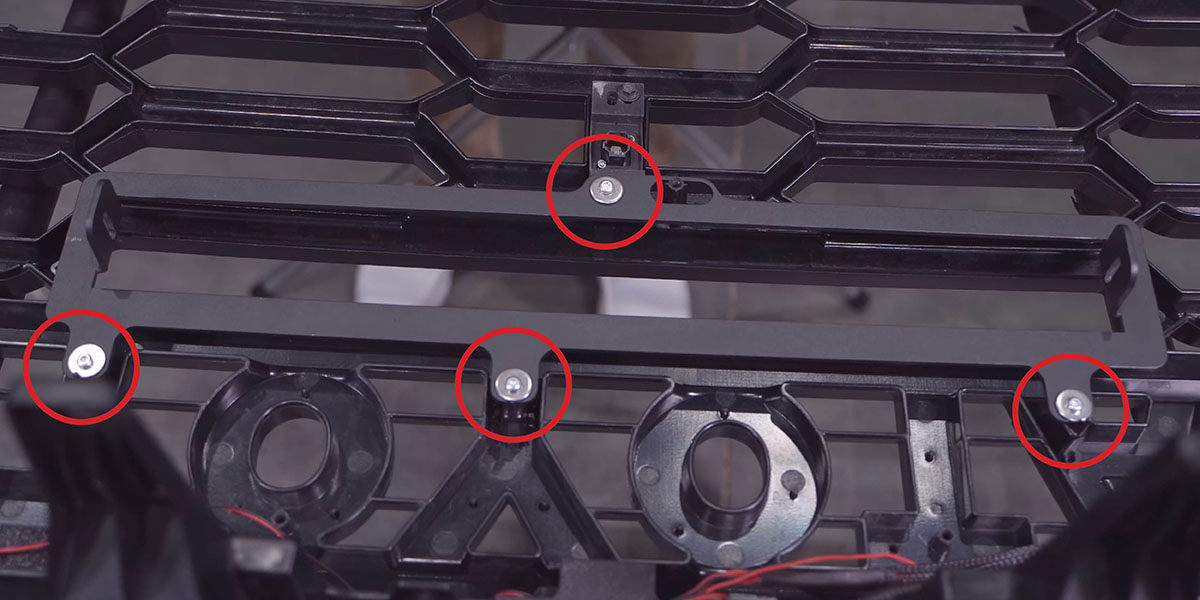
Step 10 - Install Light Bar Bracket
Secure your new light bar bracket to the grille using the four provided plastic tapping screws and washers into the existing bosses on the grille.
Note: Fully seat the new screws, but do not overtighten. Overtightening may cause plastic bosses to strip and lose strength.
Step 11- Install SS18 Light Bar
Install the SS18 light bar to the bracket using the M6 hardware included with the light bar. Position the light bar as far forward as possible.
Step 12 - Connect Wiring Harness
Once the light bar is mounted to the brackets, refer to the included wiring harness guide to connect the wiring harness. The wiring harness should be routed such that it does not interfere with the active grille shutters.
NOTE: If you are installing this kit on a TRD Pro, you will need to use the included wiring harness with a new switch to control this light bar. The factory switch cannot be used to control this light bar.
Step 13 - Reinstall Active Grille Shutters
Reverse steps 1 through 2 and 5 through 7 to reinstall the active grille shutters and front grille/bumper assembly.
Step 14 - Test Light Bar
Test the function and aim the light bar as desired. Then tighten down the bolts.
Step 15 - Complete Installation
Reverse steps 3 and 4 to reinstall the spoiler and fender molding to complete the installation.